Benchtop Workshop Machines for a Small Woodworking Shop
A small woodworking shop setup needs a stable bench, secure workholding and dust control first. Add a drill press for repeated holes, a scroll saw for detailed curves or a planer for thickness work, based on the projects you build.
On this page (10 sections)
- What does a small woodworking shop need first?
- Which benchtop machine should you buy first?
- How do you plan the space for benchtop machines?
- Which machine makes sense for different woodworking jobs?
- How should you handle dust in a small shop?
- What power, mounting and workholding details matter?
- How do you keep benchtop machines ready to use?
- Which small-shop mistakes waste the most space?
- What can wait until your projects need it?
- How do you choose a small woodworking shop setup?
A small woodworking shop setup works best when you build it around a stable bench, secure workholding and dust control, then add machines for the jobs you repeat. Choose equipment by the work it will do, the stock it must handle and the space needed to operate it.
A useful shop can be small without making every task a struggle. The goal is to keep enough room to guide a workpiece, reach controls and assemble a project without moving half the room.
This guide covers machine choices, layout and a practical buying order. For more on collection and workspace planning, see our shop setup and dust guide.
What does a small woodworking shop need first?
A small shop needs a dependable work surface, a way to hold stock and a clear working area before another machine. Lighting, power access and dust collection should support those basics.
Start with the projects on your bench
Write down your next 3 projects and the steps each requires. Separate cutting, drilling, shaping, stock preparation and assembly so you can see which jobs occur often.
A maker of small decorative pieces may need careful curved cuts more than lumber preparation. Someone building furniture from rough boards has a different need, even if both shops occupy the same floor area.
Also note the largest part in each project. A machine that handles the small pieces comfortably may still be the wrong choice for the longest rail or widest panel.
Give workholding its own space
Keep clamps close enough to use without leaving a loose workpiece balanced on a machine. Arrange a place for a vise or other holding method that does not block the bench area needed for assembly.
A woodworking vise helps hold stock for handwork, while a drill-press vise serves a different purpose. Our bench vise guide can help you choose a holding tool that fits the work.
Do not count your entire bench as available machine space. Leave a clear surface for marking parts, fitting joints and checking that an assembly is square.
Arrange light and storage around the task
Place task lighting so your hands do not hide the cut line or drill mark. Check for glare on shiny tables and shadows from shelves above the bench.
Store frequently used bits, blades and measuring tools near their work area, with sharp edges protected. Keep heavy items low and avoid storage that requires reaching over a cutter to retrieve something.
Which benchtop machine should you buy first?
Buy the machine that removes a repeated limit in your current work. Frequency matters, but so does whether you can perform the task accurately with equipment you already have.
Use this table to connect a project need with the right machine.
| Your recurring task | Machine to consider | Check before buying |
|---|---|---|
| Drilling holes at consistent angles and depths | Drill press | Reach to the hole location, bit clearance and workholding |
| Cutting detailed curves or interior shapes | Scroll saw | Blade choice, throat clearance and room to turn the part |
| Bringing prepared boards to a target thickness | Thickness planer | Reference face, stock limits and infeed and outfeed space |
| Flattening a board face or squaring an edge | Jointer | Board support, capacity and how it fits your lumber workflow |
| Shaping or sharpening compatible metal tools | Bench grinder | Wheel suitability and separation from wood dust |
A drill press is a sensible first addition for repeated hole patterns, but it is not an automatic first buy for every shop. If drilling rarely slows your projects, spend the space on the operation that does.
Before choosing, describe the result you need in plain terms. “Make matching holes in several rails” points to a clearer requirement than “buy a more powerful tool.”
Include supporting gear in the decision. A machine that needs a stand, clamps, stock supports and a collection connection should be judged as a complete station.
If drilling is your main need, our benchtop drill press guide compares options. Check capacity against your actual parts before comparing extra features.
How do you plan the space for benchtop machines?
Plan for the machine and the full movement of the workpiece, plus space for you to operate it. The base dimensions are only the starting point.
A planer processes stock in a straight path, while a scroll saw needs room to turn a part around the blade. A drill press needs clearance under the bit and enough support beside its table.
What should you measure for a small woodworking shop setup?
Measure bench depth, working height, overhead clearance and your longest workpiece. Include the space taken by handles, guards, clamps, collection hoses and open covers.
Mark a proposed machine position with tape, then use a piece of cardboard or an unpowered layout to check reach. Controls should be accessible without stretching across the cutting area.
Check service access too. You need room to change a blade or bit, adjust a belt where required and clean the machine without dismantling the whole station.
Keep doorways and exit routes open during operation. A layout that works only with stock blocking the door needs revision.
Plan the board path before fixing the stand
For a planer, reserve a straight path before and after the machine that accommodates the boards you intend to process. Place stock supports where they can carry the board without pushing it above the machine's feed level.
Check this path with the shop in its normal state. A parked vehicle, open cabinet door or stored sheet can remove the clearance that looked available on paper.
Give long parts support at the drill press as well. A small table cannot safely carry every rail or panel without help.
Use shared space where changeovers stay simple
A shared station can work for tools used at different stages of a project. It makes less sense when you must switch between them repeatedly for every part.
Compare machine weight and mounting needs before planning to lift a tool into storage after every use. A stable stand that moves and locks securely may be more practical, if the machine's instructions permit that arrangement.
Keep the assembly area easy to restore. If clearing it requires several heavy lifts, the shop will be harder to use than its floor plan suggests.
Which machine makes sense for different woodworking jobs?
Choose each machine for a specific operation and workpiece size. These 4 options serve different roles, so the best addition depends on the work missing from your shop.
Drill press for repeatable holes
The WEN 4206T suits a shop making small parts with repeated holes, controlled depths or consistent angles. Skip it if your main work requires holes far inside wide panels or deep drilling beyond its capacity.
It has a 2.3-amp motor, an 8-inch swing and 2 inches of spindle travel. Its 6.5 by 6.5 inch table tilts up to 45 degrees in either direction, and 5 belt-selected speeds range from 750 to 3,200 RPM.
Swing describes reach, not drilling depth. On a conventional drill press, an 8-inch swing means about 4 inches from the spindle center to the column, which limits how far into a panel you can place a hole.
Spindle travel describes the quill's downward movement. The usable setup must also leave room for the bit, workpiece, backing board and any vise.
The keyed chuck accepts bits from 1/20 to 1/2 inch, and the locking depth stop helps repeat hole depth. Neither feature removes the need to secure the stock.
For repeated holes, use a clamped fence or stop to locate matching parts. Arrange the clamps so the work cannot spin if the bit catches, and support long pieces at table height.
Place a backing board beneath through-holes to support the fibers as the bit exits. Remove the chuck key before starting, and shut off the press before clearing chips or adjusting the setup.
Choose speed for the bit type, diameter and material rather than leaving the belt in one position for every job. See our guide to using a drill press for setup and operation.
Scroll saw for small curves and detail cuts
The WEN 3921 suits decorative parts, lettering and small projects with curved edges or interior openings. Skip it as your main saw if your priority is breaking down boards or resawing lumber.
It has a 16-inch throat in the standard blade position and cuts wood up to 2 inches thick. The table tilts up to 45 degrees to the left, and the blade can be fitted in the standard direction or turned 90 degrees.
Turning the blade changes how you approach the work and can help with longer pieces. It does not remove the need to support the stock or provide room to move it around the saw.
The saw accepts pinned and pinless blades and includes a flexible light, air pump, dust port and hold-down foot. The air pump clears the cut line; source collection serves a different job.
For fine interior cuts, compare the blade and holder with the size of the entry hole your pattern allows. A design that looks simple on paper may need repeated blade changes to reach separate openings.
Use a blade suited to the material and tightest curve, then set tension according to the manual. Feed steadily and let the blade cut instead of forcing the piece sideways through a turn.
Treat maximum thickness as a capacity limit, not a promise that every thick piece will be easy to cut. Dense stock, tight curves and a fine blade require more patience.
Keep the hold-down foot adjusted for the work without preventing movement. Read how to use a scroll saw for beginners before setting up a pattern.
If you are choosing a saw for broader woodworking tasks, compare band saws and scroll saws before committing the bench space.
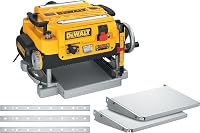
Thickness planer for lumber preparation
The Craftsman CMEW320 suits shops that regularly need prepared boards brought to a matching thickness. Skip it for now if you buy stock at its finished thickness or lack a way to establish a flat reference face.
It has a 15-amp motor, a 12.25-inch cutting width and a 2-knife cutterhead. The double-edged knives are reversible, and a vacuum port provides a connection for chip collection.
A planer makes the upper face parallel to the face resting on its bed. Feeding a bowed or twisted board through without proper preparation can leave the underlying shape unresolved.
Plan the lumber workflow before buying the machine. Decide whether you will buy stock with one face already flat or create that reference surface with another suitable method.
Inspect boards for embedded metal, loose defects and grit before feeding them. Check the manual's minimum stock length and other material limits rather than trying to pass a short offcut through.
Take light cuts suited to the board's width and grain. Support stock without lifting either end, and keep your hands away from the feed openings.
Allow some extra length when planning parts so end defects can be trimmed after milling. Mark the reference face and check thickness between passes rather than removing more wood than the project needs.
The planer also needs a collection setup able to handle its chips. See our thickness planer guide for operation, and compare planers and jointers before building a rough-lumber station.
Bench grinder for sharpening and shaping
The DeWalt DW758 suits a shop with a recurring need to grind compatible metal tools. Skip it if you mainly need final edge honing or have no place to separate grinding from wood dust.
It has a 3/4 HP induction motor running at 3,600 RPM. The grinder includes 36-grit and 60-grit wheels, aluminum tool rests, eye shields and spark deflectors.
The cast iron base and motor housing need a secure mounting surface. Leave room beside the wheels for the longest tool you expect to position.
Match the wheel to the material and task. Do not assume the included wheels suit every tool alloy or that any replacement wheel is safe at the grinder's speed.
Grinding removes metal and can generate heat quickly. For edge tools, use a method appropriate to the steel and follow with honing when the task calls for a finished cutting edge.
Keep sparks away from wood dust, solvents, finishes and collection equipment. Do not send grinding sparks into a wood-dust collection system.
Inspect wheels and guards before use, and set the tool rests and spark deflectors to the clearances required by the manual. Wear suitable eye protection even with the shields fitted.
Avoid sideways pressure on a wheel unless it is designed for that use. Read how to use a bench grinder safely before arranging a grinding station.
How should you handle dust in a small shop?
Choose source collection that matches each machine, then plan filtration and cleanup around the dust that escapes. A port connection alone is not a complete dust system.
Match collection to the machine's needs
Check required airflow, hose size and material compatibility before choosing a vacuum or collector. An adapter can join different diameters, but it cannot make an undersized system move enough air.
A planer creates a different collection task from a fine-detail saw. Consider chip volume and bin capacity as well as fine-dust filtration.
Keep hose runs practical and avoid unnecessary restrictions. Position the collector so you can empty it and service its filter without dragging it through the work area.
Our small shop dust collector guide explains the choices for machine collection. Make this decision before fixing a machine where the hose will be hard to route.
Keep the floor and air easier to manage
Route cords and hoses away from walking paths and moving stock. Leave enough slack for normal adjustments without creating loops that can catch your feet.
Capture dust close to its source and clean settled dust with equipment suited to it. Blowing debris off every surface spreads fine particles around the room.
Use suitable respiratory protection for the task and follow its fitting instructions. General ventilation can help with room conditions, but it does not replace collection at the machine.
If the shop shares space with stored household items, separate those items from dusty operations. Keep finishing materials away from spark-producing work and protect clean assembly surfaces from debris.
What power, mounting and workholding details matter?
A usable station needs suitable electrical service, secure mounting and repeatable workholding. Resolve these before treating a machine as ready to use.
Check power for the whole working station
Read the machine's electrical instructions and identify the circuit serving its outlet. Account for the collector and other equipment that may run at the same time.
Do not assume 2 nearby outlets are on separate circuits. If circuit capacity is unclear or protection trips repeatedly, have a qualified electrician assess the setup.
Use extension cords only as permitted by the equipment instructions, with the correct rating and length. Place the shutoff within easy reach and keep cords clear of the workpiece path.
Mount for the force of the operation
A bench must resist the loads created during feeding, drilling or grinding. Follow the machine's mounting instructions and check that the support cannot rock or shift.
Do not use a loose machine as a counterweight for an unstable stand. Secure the station itself and confirm that any wheels are locked before starting.
Choose working height by the task. Detailed cuts require a clear view, while feeding stock requires a position that lets you guide it without straining or reaching across danger areas.
Make repeatable setups easy to rebuild
Keep frequently used fences, stops and backing boards together. Mark useful settings where appropriate, but verify alignment after moving a machine or changing its setup.
Disconnect power before adjustments, blade or wheel changes and maintenance as directed by the manual. Clear tools and offcuts from the table before reconnecting.
Avoid gloves near rotating machinery where they can catch. Secure loose clothing, tie back long hair and use eye and hearing protection appropriate to the operation.
How do you keep benchtop machines ready to use?
Keep machines clean, dry and correctly adjusted, with sharp cutting tools and clear collection paths. Short checks before use prevent neglected setup problems from carrying into the next project.
Brush or vacuum accessible chips after stopping and disconnecting the machine as required. Clean tables with products suitable for their surfaces, and keep residue away from feed rollers, belts and gripping areas.
Inspect blades, bits, knives and wheels for wear or damage. Replace damaged consumables and follow the manual's instructions for sharpening, reversal or replacement.
Check mounting bolts, guards and stock supports after moving equipment. Recheck table alignment and stops when a job depends on matching parts.
In a damp garage, watch metal surfaces for rust and address moisture rather than repeatedly covering the symptoms. Store cutting tools where their edges stay dry and cannot strike one another.
Which small-shop mistakes waste the most space?
The biggest layout mistake is buying for an imagined shop instead of your current projects. The next is measuring only the machine while ignoring everything needed to use it.
Filling the bench before planning assembly
A bench covered with machines leaves nowhere to fit a drawer or clamp a small frame. Reserve assembly space before deciding how many stations the room can hold.
Store seldom-used accessories away from the main work surface. Keep the items needed for the current operation within reach.
Treating capacity numbers as interchangeable
Swing, throat depth, spindle travel and cutting width describe different limits. Match each one to the part and operation rather than comparing the largest number in a tool name.
Draw the intended hole location or cut path on a sample-size workpiece. This makes reach and clearance problems easier to spot before you buy.
Making every operation require a full reset
Shared space works best when machines follow the order of the work. Batch similar tasks so you can drill matching parts or plane a group of boards before changing stations.
Avoid a layout that requires moving a heavy machine several times for one small project. A smaller tool collection can produce a smoother workflow.
Buying rough lumber without planning preparation
Rough boards need reference surfaces before accurate sizing and joinery. A planer alone does not cover every step.
Compare the space and equipment required for milling with buying prepared lumber. For occasional projects, paying for preparation can preserve room for the work you enjoy most.
What can wait until your projects need it?
Delay any machine that lacks a clear, recurring job. Open space has value when it supports safe handling, assembly or storage for the tools you already use.
A planer can wait while you work with prepared boards. A scroll saw can wait if your designs use mostly straight cuts.
A grinder can wait if you have no regular grinding task or safe spark-free separation from dusty work. A drill press can wait if your current drilling needs are occasional and manageable with existing tools.
Keep a short note of tasks that slow each project. Repeated problems give you a better buying order than a checklist of machines found in larger shops.
Before the next addition, identify its station, collection connection and workholding method. If those remain unresolved, finish the space plan first.
How do you choose a small woodworking shop setup?
Choose a small woodworking shop setup by matching one recurring task to a complete working station. Buy when the machine, stock supports, power and collection can all fit without taking away essential assembly space.
- Choose the WEN 4206T for repeated holes in parts that fit its reach and drilling clearance.
- Choose the WEN 3921 for detailed curves and interior cuts in smaller woodworking projects.
- Choose the Craftsman CMEW320 when thicknessing prepared boards is a regular part of your work.
- Choose the DeWalt DW758 when compatible tool grinding justifies a separate, clean station.
If none solves a frequent problem, improve the bench, workholding or layout first. That work will support whichever machine earns its place later.
For your next step, use our shop setup and dust guide to plan the collection and layout around the station you choose.
Frequently asked questions
What machine should I buy first for a small woodworking shop?
Buy the machine that solves your most frequent project problem after arranging a stable bench, secure workholding and dust control. A drill press suits repeated holes, a scroll saw suits detailed curves, and a planer suits thickness work on boards that already have a flat reference face.
Can I run benchtop woodworking machines in a small garage?
Yes, if the garage has enough operating clearance, suitable power and effective dust control. Measure the path of your longest workpiece, preserve access to doors and leave room for clamps, hoses and stock supports; secure each machine as its manual directs before using a shared bench or movable stand.
Do I need a planer and a jointer?
You need both functions when you regularly turn rough, uneven boards into flat stock with parallel faces and square edges. A jointer creates reference surfaces; a planer brings the opposite face to thickness, and you can delay either machine if you buy lumber with the surfaces your projects already need.
Is a shop vacuum enough for woodworking dust?
A shop vacuum can suit tools designed for its airflow and hose size, but it is not the right choice for every machine. Check collection requirements, filtration and chip volume before choosing; capture dust at the source, keep the system clear and use suitable respiratory protection when the task requires it.