How to Use a Drill Press
Here's how to use a drill press: secure the workpiece, match the speed to the bit and material, set the depth, and feed steadily. Remove the chuck key before starting and wait for a full stop before making adjustments.
On this page (9 sections)
- How do you use a drill press step by step?
- How should you secure a workpiece?
- How do you choose a drill press speed?
- How do you set the drilling depth?
- How do you drill straight holes without tear-out?
- Which drill press fits a beginner's projects?
- Which drill press mistakes should you avoid?
- How should you clean and care for a drill press?
- How should you use a drill press for your next project?
Here's how to use a drill press: clamp the work, choose the speed for your bit and material, set the depth, then lower the bit with steady pressure. Remove the chuck key before starting and wait for a full stop before adjusting anything.
The machine guides the bit, but secure workholding and a careful setup make straight, repeatable holes possible. Start with scrap that matches your project before drilling the finished piece.
How do you use a drill press step by step?
Set up with power disconnected, then drill with the work secured and the bit clear of clamps and the table. Read your machine's manual before using its controls.
- Put on eye protection, tie back long hair, and remove jewelry. Secure loose sleeves and don't wear gloves near rotating parts.
- Unplug the press before fitting the bit, moving the table, or changing belts.
- Insert the bit straight and tighten the chuck as directed. Clamp the smooth shank, keeping the flutes outside the jaws, and remove the key.
- Support the work on the table or in a suitable vise. Secure both the work and any vise against movement.
- Choose the speed, lock the table, and set the depth stop.
- Check alignment and the full drilling path with power disconnected. Raise the bit clear, close the belt cover, and reconnect power.
- Start the press and feed smoothly. Retract the bit, switch off, and wait for it to stop before moving the work.
How to use a drill press for your first hole
Choose a small piece of flat scrap that you can clamp securely over a backing board. Mark the center, then lower the stationary bit to the mark with power disconnected.
After drilling, stop the machine before checking the hole's position and depth. Change one setting at a time so you can identify what improves the result.
How should you secure a workpiece?
Clamp the work to the table or use a secured drill press vise. Your hands cannot safely resist a board or metal part that catches on the bit.
For flat boards, use a backing board and clamps outside the drilling path. Support long stock at table height so its weight doesn't tip the work or pull it out of alignment.
A vise helps with small parts, but a loose vise can spin too. Check mounting-slot alignment, bolt clearance, and the space left beneath the bit before choosing one.
The Wilton 4-Inch Drill Press Vise suits round stock because its hardened jaws have V-grooves. Its 4 in jaw opening and 1-1/2 in jaw depth also give you room to grip parts that need deeper jaw engagement.
Choose the Wilton for round pieces that fit its jaws and can be supported securely. Skip it for broad panels better held with table clamps, or if its height leaves too little drilling clearance.
The WEN DPA424 suits small, flat-sided parts in wood, metal, or plastic. It has a 4 in opening and a 1 in throat depth, so check how much of your part the jaws can support.
Skip the DPA424 if you need deeper jaw support or a dedicated round-stock fixture. Its broad compatibility still requires checking the actual table and mounting fit.
A drill press vise serves a different purpose from a bench-mounted vise. Our bench vise guide explains the workholding choice for jobs away from the drill press.
How do you choose a drill press speed?
Match speed to bit diameter and material, using the bit manufacturer's guidance and your machine's manual. Larger cutting diameters generally need slower speeds, including wide wood-boring bits.
The WEN 4206T offers 750, 1100, 1500, 2100, and 3200 RPM. Change its belt position only with power disconnected, then close the cover before starting.
Use the drill press speed chart for wood to narrow your starting setting. If a bit requires a speed below the press's minimum, choose a compatible bit or a different machine.
Don't use more feed pressure to compensate for the wrong speed or a dull bit. Stop and check the setup if the bit burns the wood, chatters, or struggles to cut.
How do you set the drilling depth?
Use the depth stop for blind holes and repeated depths. Set it with power disconnected, following the manual's method for measuring travel from the work surface.
Drill scrap of the same thickness with the same backing arrangement, then stop and measure. A pointed bit leaves a deeper center than the full-width part of the hole, which matters when leaving a thin wall beneath it.
For through-holes, place a secured backing board beneath the work. Set enough travel to finish the hole without drilling into the metal table.
Don't force the feed handle against the stop. If the hole is too shallow, disconnect power and correct the setting.
How do you drill straight holes without tear-out?
Square the table to the bit, support the work flat, and ease pressure near breakthrough. A table's angle scale is a starting reference; check the setup with a suitable square.
With power disconnected, lower the bit to your center mark before locking the work in position. Recheck after tightening clamps because clamping can shift the piece.
Feed firmly enough for the bit to cut without bending or stalling. For deeper holes, retract periodically to clear chips as appropriate for the bit and material.
Keep hands and brushes away while the spindle turns. Stop the machine before clearing packed chips or investigating a blocked hole.
For repeated hole locations, use a securely clamped fence or stop block where suitable. Keep its fasteners outside the bit's path, and don't reposition work until rotation stops.
Which drill press fits a beginner's projects?
Choose by reach, usable clearance, spindle travel, and required speeds. Motor size alone won't tell you whether a press can handle your planned setup.
Swing describes reach: an 8 in swing places the spindle center about 4 in from the column. A hole farther from a board's edge may require a larger machine.
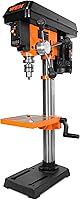
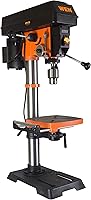
The WEN 4206T suits small parts and shallow holes with its 2 in spindle travel and 1/2 in keyed chuck. Skip it if your projects need deeper uninterrupted travel, more reach, or slower speeds than it offers.
Its roughly 23 in height and 7 by 11 in base help with bench planning. Allow extra room for long stock, the feed handle, belt-cover access, and comfortable use of the switch.
Mount the press to a sturdy surface through its mounting holes according to WEN's instructions. A small footprint doesn't remove the need for secure mounting.
Compare alternatives in our best benchtop drill presses guide, or read the WEN 4206T drill press review for more detail on this compact model.
Which drill press mistakes should you avoid?
Avoid loose work, unsupported stock, and rushed adjustments. Stop immediately if the work shifts, the bit binds, or the machine vibrates unusually.
- Leaving the chuck key in place: remove it as soon as you finish tightening.
- Holding thin metal by hand: clamp it securely because the bit can grab as it breaks through.
- Ignoring vise height: confirm the bit can reach the work without running out of clearance or travel.
- Forcing a stalled bit: switch off, wait for motion to stop, and disconnect power before investigating.
- Using a loose fence as a restraint: secure the work against rotation and lifting, not just sideways movement.
Plan enough clear bench space to handle the stock safely. Our small woodworking shop setup guide can help you place machines around the work they need to support.
How should you clean and care for a drill press?
Disconnect power and brush away chips after use. Let hot bits and workpieces cool before handling them, and keep sharp metal chips away from bare fingers.
Clean debris from the chuck and bit shank before the next setup. Check bits for damage, inspect the power cord, and keep the table and mounting fasteners secure.
Follow the manual for lubrication and belt care. Don't apply oil to belts or pulleys, and keep the chuck's gripping surfaces free of oil.
How should you use a drill press for your next project?
Choose the machine and workholding around the hole you need. Knowing how to use a drill press starts with confirming reach, depth, speed, and a secure way to hold the part.
Choose the WEN 4206T for compact projects within its travel and speed limits. Choose the Wilton vise for suitable round stock or deeper jaw support, and the WEN DPA424 for small parts its shallower jaws can hold securely.
For broad boards, table clamps and a backing board may be the better setup. Before buying, measure your largest planned workpiece and use our guide to choosing a drill press for a home shop to check the fit.
Frequently asked questions
How do you use a drill press for the first time?
Read the manual, secure the machine, and practice on scrap first; with power disconnected, fit the bit, clamp the work, and set the speed and depth. Remove the chuck key, check clearance, then start with the bit above the work and feed with steady pressure.
Should you hold wood by hand on a drill press?
No, clamp wood to the table or hold it in a vise secured to the table; a bit can catch and spin a loose board, especially near breakthrough. Support long pieces, keep clamps outside the drilling path, and stop the machine before repositioning the work.
How do you set the depth on a drill press?
Use the depth stop to limit how far the spindle descends; with power disconnected, follow the manual to reference the work surface and set the required travel. Drill scrap with the same setup, stop the machine, and measure the hole before drilling your finished piece.
What speed should a drill press use for wood?
Choose speed from the bit manufacturer's guidance for the bit diameter and wood type; large bits generally need slower speeds than small bits, but there is no single setting for all wood drilling. Use a wood speed chart as a starting point and stay within the machine's limits.