How to Tune a Band Saw
Here's how to tune a band saw: inspect the blade, set tension and tracking, adjust the guides, and square the table. Unplug the saw before adjustments, follow its manual's setup order, then check the result with a scrap-wood cut.
On this page (9 sections)
- How to tune a band saw step by step
- What should you check before adjusting anything?
- How do you set blade tension and tracking?
- How should you position the blade guides?
- How do you square the table and check the fence?
- How do you check cut quality after tuning?
- Which common mistakes cause drift, burning, or vibration?
- What care keeps the setup useful between sessions?
- Should you replace the blade, service the saw, or buy another machine?
Here's how to tune a band saw: inspect the blade, set tension and tracking, position the guides, and square the table. Unplug the machine before adjustments, and follow its manual's order because controls and guide designs differ.
Start with the blade you intend to use, then confirm the setup on scrap wood similar to your project. Changing blades afterward means checking tension, tracking, and guides again.
How to tune a band saw step by step
Tune the saw around a sound, correctly sized blade, then check each adjustment before cutting. Keep power disconnected while your hands are near the blade or wheels.
- Inspect the blade for cracks, kinks, missing teeth, and dullness.
- Confirm its length, width, thickness, and cutting direction match the saw's requirements.
- Move the guides clear as directed so they don't interfere with setup.
- Set tension and tracking in the manual's order.
- Recheck both settings, since changing one can affect the other.
- Adjust the upper and lower guides, including the rear thrust supports.
- Square and lock the table, then check the fence if fitted.
- Set guide height, secure guards and covers, and clear tools before reconnecting power for a scrap cut.
A stable mounting surface matters too. Our guide to benchtop workshop machines helps you plan support and working space.
What should you check before adjusting anything?
Check blade condition and fit before turning adjustment knobs. No amount of tracking or guide work will straighten a kinked blade or restore dull teeth.
Use the manual's cleaning method to remove chips from the table, wheel tires, and guide area. Debris can interfere with blade support or prevent the workpiece from sitting flat.
Inspect accessible parts for damage or looseness. Stop and arrange service if a wheel has play or a guide assembly won't hold its position.
When does tuning a band saw require a new blade?
Replace a damaged or dull blade before tuning, and choose its width and tooth pattern for the cut. A narrow blade suits tighter curves; a wider blade generally offers more support for straight cuts, within the saw's approved range.
Tooth spacing matters too. Coarser teeth leave more room for chips in thicker wood, while finer teeth suit thinner stock where too few teeth in contact can snag.
The POWERTEC blade has a carbon-steel body and hook teeth. It suits owners of compatible saws who need a blade for straight cuts and broad curves in wood.
Skip it if your saw needs another length or your project needs tight turns. Match all blade dimensions, including the 0.014-inch thickness, rather than choosing by brand name or nominal saw size.
POWERTEC includes plastic and non-ferrous metals among its applications, but your machine must also permit the material and required speed. Its stated compatibility includes Skil 3104, so don't assume it fits the SKIL BW9501 below.
How do you set blade tension and tracking?
Set tension for the installed blade, then position it on the wheels as your manual directs. Use small tracking changes and turn the wheel by hand where instructed to see how the blade settles.
Avoid using a universal blade position, such as always centering the teeth on the tire. Wheel shape and blade width affect the correct position.
Too little tension lets the blade deflect; too much strains the blade and machine. Don't keep increasing tension to compensate for a dull blade or an aggressive feed.
If the blade won't hold its position, revisit fit, tension, and wheel condition. Running the saw with open covers isn't a shortcut for checking tracking.
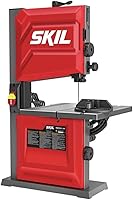
The SKIL suits small woodworking projects where accessible setup controls matter. Its quick blade-tension setting helps with blade changes, and rack-and-pinion table adjustment helps when moving between square and angled cuts.
Its 2.8-amp induction motor and 2-speed drive system suit buyers considering a compact woodworking saw. Skip it if your planned stock needs more cutting clearance than its manual allows; motor amperage doesn't guarantee capacity.
The drive system offers tool-free belt tensioning, which is separate from blade tension. Identify the correct control before adjusting either one.
How should you position the blade guides?
Set both upper and lower guides to the manual's clearances, keeping side guides clear of the tooth set. The rear thrust support also needs the specified gap or position.
Don't squeeze the blade between the guides to force it straight. Guides support a correctly tensioned and tracked blade; they shouldn't steer a poor setup.
With power disconnected, rotate the wheel by hand as directed and check for binding. Rough bearings, loose blocks, or guides that won't stay set need service before use.
Lower the upper guide assembly to the manual's recommended clearance above the workpiece. Leaving it high exposes more blade and increases the unsupported span.
How do you square the table and check the fence?
Square the table against the blade's flat side, avoiding the teeth, then lock it and recheck. A table scale is a starting point, not a substitute for a square or angle gauge.
Check that the table insert sits properly and that the workpiece won't catch as it passes. For bevel cuts, confirm the angle after tightening the table lock.
The ShopMax suits buyers whose projects need its stated 4.5-inch cutting depth and 10-inch width capacity. It has a 4.2-amp induction motor, steel construction, and ball bearings.
Choose it around those project dimensions rather than amperage alone. Skip it if you need deeper cuts, or if your bench can't safely support its 54.7-pound weight and working loads.
It uses a 67.4-inch blade, so the POWERTEC replacement above isn't a match. Before choosing any saw, check that blades in the widths you need are available.
Check fence alignment only after the blade setup is sound. Use a fence for suitable straight cuts; don't trap a curved workpiece against it or angle it to hide unresolved blade drift.
How do you check cut quality after tuning?
Make a straight cut in suitable scrap with steady, light feed pressure. Secure all guards and covers first, wear eye protection, and use appropriate supports and push aids to keep hands clear.
Choose scrap similar in thickness and material to the project. Thin softwood won't reveal every problem you may encounter in thicker hardwood.
Check whether the cut follows the line and stays square through the thickness. Then try a gentle curve if that's part of your planned work.
If the saw rubs, vibrates unusually, binds, or burns the wood, switch off and wait for the blade to stop. Disconnect power before investigating.
Don't twist the work to force a curve tighter than the blade allows. For intricate shapes, band saw vs. scroll saw explains which machine suits the work, and our scroll saw beginner guide covers smaller cuts.
Which common mistakes cause drift, burning, or vibration?
Start with the symptom and change one thing at a time. Several adjustments at once make it hard to identify the cause.
- Wandering cut: inspect blade sharpness and suitability, then tension, tracking, guides, and feed pressure.
- Cut square at the top but angled below: recheck table alignment and blade deflection under feed pressure.
- Burn marks: look for dull teeth, packed debris, binding in a curve, or feed that's too slow.
- Rubbing near the guides: check clearances and whether a guide touches the tooth set.
- Unusual vibration: stop and inspect mounting, blade condition, and wheel-area debris.
Another common mistake is buying a replacement saw before checking the blade. A suitable fresh blade can resolve a cutting problem that adjustment alone can't fix.
What care keeps the setup useful between sessions?
Remove dust regularly and check settings after blade changes or moving the saw. Follow the manual for lubrication and tension release rather than applying a general routine to every machine.
Disconnect power before cleaning internal areas. Keep wheel tires and guides free of buildup, and avoid cleaners or lubricants that the manufacturer doesn't approve.
Connect suitable dust extraction while cutting. The SKIL accepts a standard 2 1/2-inch vacuum hose, while the ShopMax has a connector for a ShopMax extractor sold separately.
Plan collection around the machine's connection and your workspace. Our guide to dust collectors for a small shop explains the wider shop choices.
Should you replace the blade, service the saw, or buy another machine?
Replace the blade for dullness or damage, arrange service for mechanical faults, and buy another saw when capacity limits your work. Those decisions solve different problems.
Choose the POWERTEC only after confirming blade fit and cut suitability. Consider the SKIL for its setup controls, or the ShopMax when its stated cutting capacity matches your projects.
Knowing how to tune a band saw also helps you judge a new machine: check blade availability, guide access, table locks, and dust connections. Compare our best benchtop band saw picks before choosing, or browse the scroll and band saws category for related guides.
Frequently asked questions
How tight should a band saw blade be?
Use the tension specified for your saw and blade width. Too little tension can allow wandering, while too much strains the blade and machine; a general finger-pressure check isn't a substitute for the manual's procedure.
After adjusting tension with the saw unplugged, recheck tracking and guide clearance.
Should band saw guides touch the blade?
Follow your saw's guide-clearance instructions because bearing and block designs differ. Side guides must stay clear of the teeth and support the blade without pinching it; the rear support needs the specified position too.
With power disconnected, rotate the wheel by hand as instructed to check for binding.
Why does my band saw blade drift?
Drift can come from a dull or damaged blade, a blade unsuited to the cut, incorrect tension, poor tracking, or guide misalignment. Forcing the work can also push the blade off course.
Inspect those causes before changing the fence angle, which can hide the original problem.
How often should I tune a band saw?
Check the full setup whenever you change blades, move the saw, or notice wandering, rubbing, or burning. Before each work session, check blade condition, guide height, table locks, and guards.
Unplug the machine for adjustments, and follow its manual for cleaning, service intervals, and any tension-release routine.